nv_it
novelibre Pagina principale > Pagine italiane > Aiuto in linea > Capitolo/Parte properties
Capitolo/Parte properties
The Chapter/part properties view opens in the right pane when you select a chapter or a part in the tree. You can edit the properties of the selected chapter or part.
Hint
You can change any chapter into a part or vice versa via the Modifica livello entry in the context menu, the Parte menu, or the Capitolo menu.
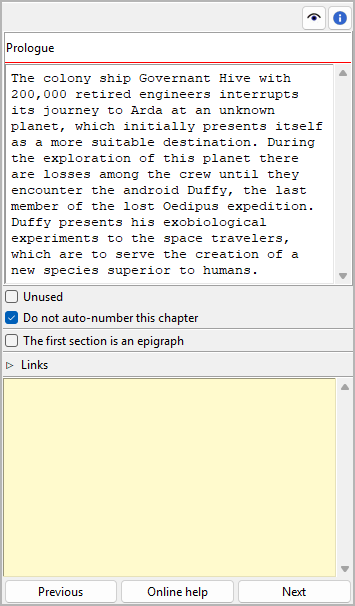
Title and description
Title and description are displayed in an editable “index card”.
The editing of the title can be completed by pressing the Enter key.
Changes to the description are applied when the mouse is clicked
anywhere outside the text input field.
Note
Depending on your Book settings, novelibre might overwrite the title the next time the tree is refreshed. Thus, you don’t need to edit the capter/part title, if auto numbering is activated and the selected chapter or part is not excluded from auto numbering (see below).
Non utilizzato
With the Non utilizzato checkbox, you can change the chapter type.
Non numerare automaticamente questo capitolo/Non numerare automaticamente questa parte
If this checkbox is ticked, the selected chapter or part will be excluded from auto numbering, and the title you enter manually will persist.
La prima sezione è un’epigrafe
If this checkbox is ticked, the chapter’s first section is formatted as an epigraph, if it is of the Normale type.
Collegamenti
Expand or collapse this frame by clicking on the label.

This is a list for image and research document links.
Although novelibre holds some character/location/item data, it is not the right application for extensive world building. For this, you may want to use more powerful software, like Zim Desktop Wiki. In this case, novelibre allows you to create links to the text files that will take you quickly to the right places in the wiki.
Or you have collected some images that could inspire you when writing. Then simply create links to these images to open them with your system’s standard image viewer.
Tip
If you have collected several images for a character in a folder that your standard image viewer can browse through, a single link to any image file is sufficient.
The links are displayed in a list in the order they are entered.
Aggiungi Link
When clicking on  , a file selection dialog
opens. The selected file will be added to the link list.
, a file selection dialog
opens. The selected file will be added to the link list.
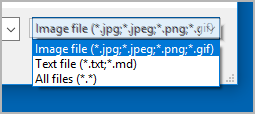
Hint
By default, the dialog shows image files. For other file types, change the selector in the lower right corner.
Rimuovi Link
When clicking on  or pressing the
 Canc
key, the selected link is removed from the list.
Aprire Link
When double-clicking on a link, or clicking on
 , the link is opened with the standard
application for the link’s file type.
, the link is opened with the standard
application for the link’s file type.
Hint
If you want to open certain linked files with another application than the standard application, you can provide a novelibre “launcher” setting. For this, just create a text file named launchers.ini in the
.novx/configdirectory (where all configuration files are stored). Here you can assign applications to the file extensions.Zim Desktop wiki pages are a special case. For this, the Zim program is assigned to the .zim extension.
This example shows a setting that makes novelibre open text files with the Zim Desktop Wiki application instead of the standard text editor:
[SETTINGS]
.zim = C:/Program Files (x86)/Zim Desktop Wiki/zim.exe
“Sticky note”
The yellow text area is for notes. Changes are applied when the mouse is clicked anywhere outside the text input field.
When the “sticky note” of a plot point contains text, “N” is displayed in the tree view as a reminder. If the branch of a plot line with plot points containing notes is collapsed, the “N” is displayed in the plot line row.
Navigation buttons
Capitolo view
- Precedente lets you navigate to the previous chapter in the tree.
- Prossimo lets you navigate to the next chapter in the tree.
Part view
- Precedente lets you navigate to the previous part in the tree.
- Prossimo lets you navigate to the next part in the tree.
Copyright (c) by Peter Triesberger. All rights reserved.